How To – Tasks and Transformations: Execute Package Task
June 30, 2011
In my last post, I demonstrated the SSIS Foreach File loop container task in conjunction with the File System task. This week, however, I want to return to the theme of workflow tasks and discuss the Execute Package task.
Background
The Execute Package task has a straightforward purpose; allow a package to run other packages in its workflow. This enables packages to be reusable, modular components that can be shared among workflows. The package being run by the Execute Package task is usually referred to as the child package; the package running the Execute Package task is the parent.
The scenario I’m going to demonstrate is an archiving situation where one package archives files while another monitors available disk space on the archive drive, informing someone if free space falls below some threshold.
Using BIDS
I’m going to start by creating the package that monitors free space. This will be the child package that’s run by the Execute Package task. To monitor free disk space, I’m going to use a WMI Event Watcher task. If the watcher indicates that free space has fallen below a specified threshold, a Send Mail task will notify someone.
The main thing I want to address here is using a variable to control the free space threshold. As mentioned above, an advantage to using the Execute Package task is reusability. By parameterizing the threshold value, multiple packages can reuse this child package, each with their own free space minimums. The variable is going to be embedded in the WMI Event Watcher’s WQL query.
Note that if you’re looking for in-depth discussion on creating the tasks for this package, please review my past posts on the WMI Event Watcher and Send Mail tasks.
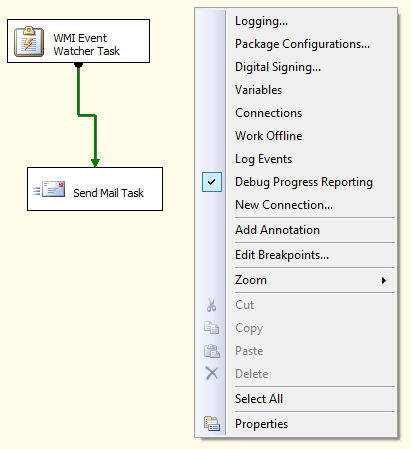
The first step is to create the variable. To do that, right click on the package designer’s background to open a context menu.
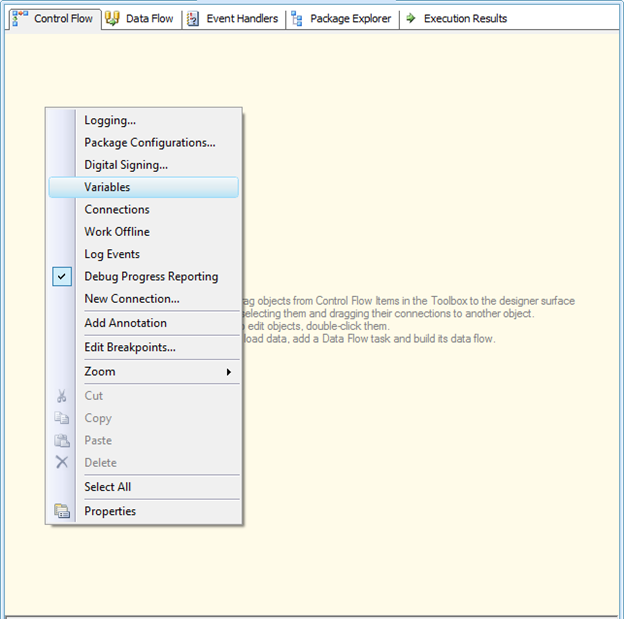
In the context menu, select Variables, which opens the Variables tool window.
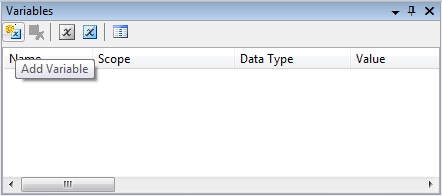
Next, press the Add Variable button to create a variable.

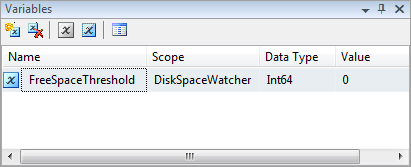
Notice that the variable’s scope is DiskSpaceWatcher, which is the name of my package.
I recommend renaming the variable to something clearer, like FreeSpaceThreshold.
In my original post on the WMI Event Watcher task, I authored the WQL query using the Direct input source type. This time, I’m going to use an expression so I can include the FreeSpaceThreshold variable in it.
After adding a WMI Event Watcher task, double click on it to open its editor dialog, and select the Expressions item on the left side.
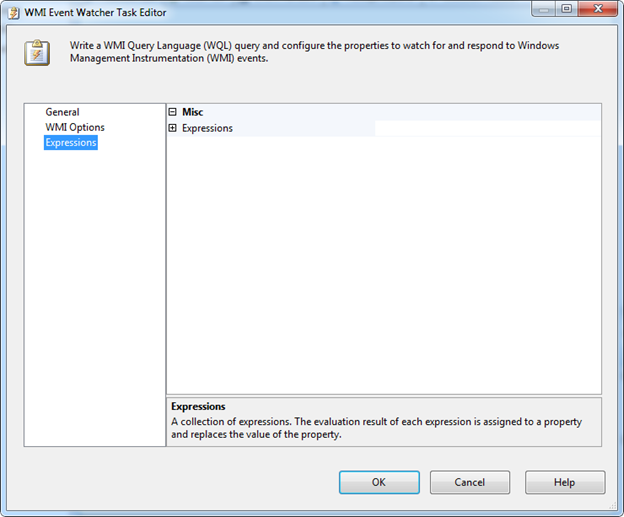
Click on the Expressions expander to expose an Expressions property. Click inside the Expressions field to display an ellipses button.

Click on the ellipses button to open the Property Expressions Editor dialog box.
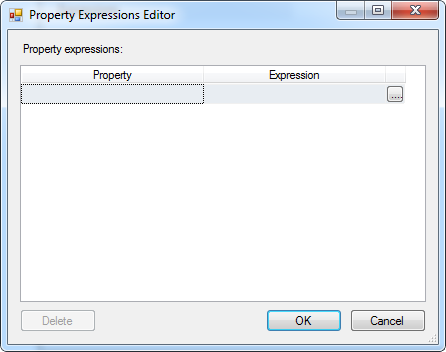
This dialog allows you to map a task property to an expression. Clicking in the Property cell exposes a combo box; clicking a second time opens the combo box.

Select the WqlQuerySource property in the drop down.

Notice that the Expression cell has an ellipses button. Click on it to open the Expression Builder dialog.
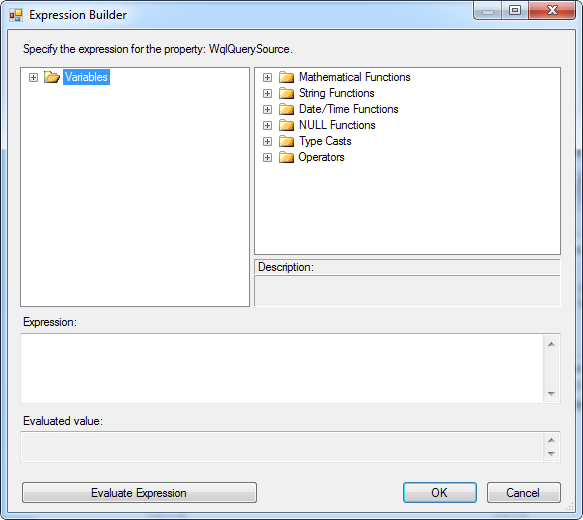
One advantage/disadvantage of the BIDS Expression Builder dialog is that it dutifully informs you if the expression you entered can be processed.
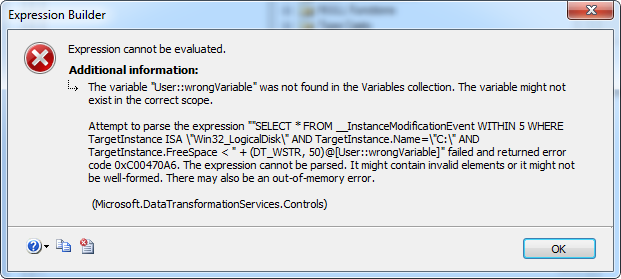
While certainly helpful to know that during design, it’s simultaneously annoying since you’re not allowed to save the Expression text until you fix it. I’ll show you later how Mist improves on this.
The next screenshot shows the expression you should enter for this example.
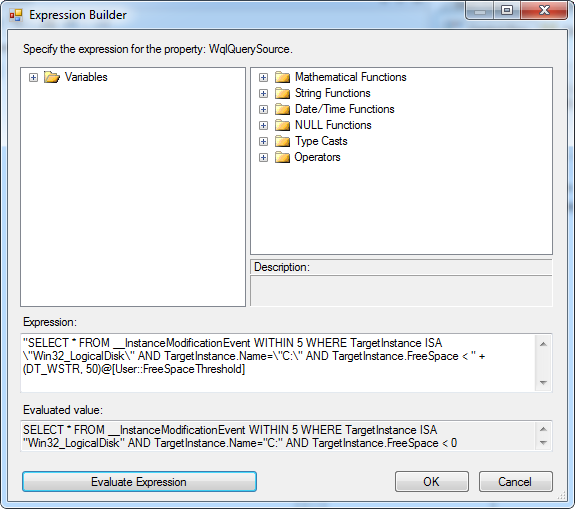
Some key things to notice in the expression are:
It’s surrounded with quotesThe quotes, around Win32LogicalDisk and C:, are escaped with a backslashThe FreeSpaceThreshold variable is appended to the expression using the + concatenation operatorThe variable is cast to DTWSTR.After entering a valid expression, you can use the Evaluate Expression button to see the evaluated value. Notice that the FreeSpaceThreshold variable appears as 0 in the Evaluated value text.
You can now dismiss the dialog, and save the expression text, by pressing OK. You’ll be returned to the WMI Event Watcher Task editor. Interestingly, the WqlQuerySource property is still blank, despite setting an expression. Furthermore, trying to close this dialog will display an error that the WQL query is missing.
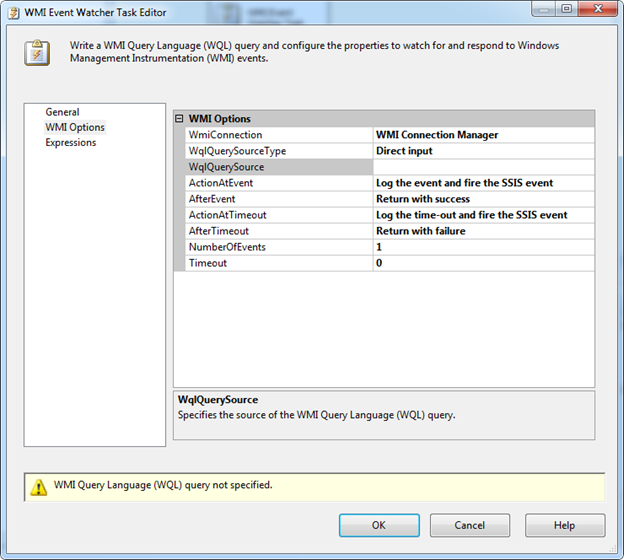
To solve this, you can enter some text into the WqlQuerySource field. I entered select. Afterwards, you can dismiss the dialog. If you reopen it, you’ll see that the WqlQuerySource field is populated with the evaluated WQL query expression.
The final workflow for this package looks like:

If the WMI Event Watcher task succeeds, indicating the threshold has been exceeded, the Send Mail task runs, notifying the appropriate person that I’m running out of archiving disk space. If the task times out, it will be treated as a failure and the package will stop executing.
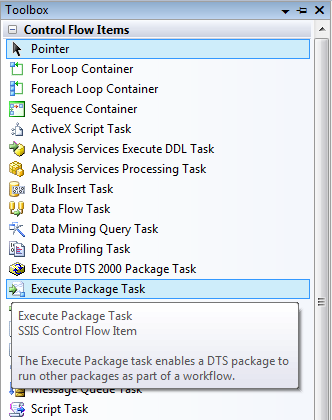
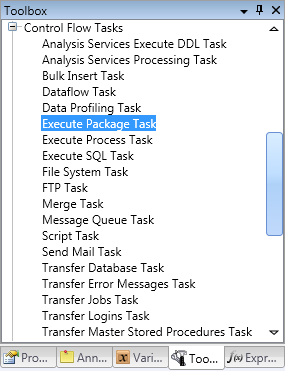
With the child package laid out, it’s time to implement the parent package. To start, find the Execute Package task in the Toolbox.
Next, drag and drop the task onto the package’s design surface.
The red X icon indicates the task has errors.

Double clicking on the Execute Package task brings up its dialog. Clicking on the Package menu item in the left ListBox shows the properties specific to this task.
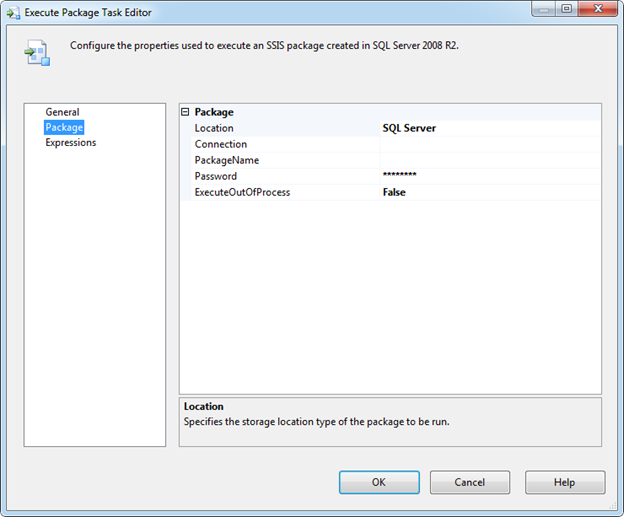
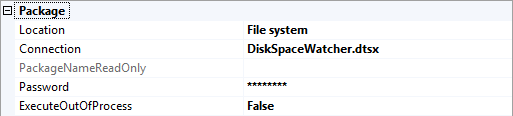
The Execute Package task needs to know where the package to-be-executed is. You can choose between a package that resizes in a SQL Server msdb database or a package anywhere in the file system. For this sample, it makes sense to choose the file system. To do that, click inside the Location field and open the dropdown to select File system.

Once File system is selected, the PackageName field beneath it becomes the PackageNameReadOnly field, and is disabled. In the File system case, BIDS determines the package name once you select the package in the file system. IF you use a SQL Server page, then you’d need to provide the package name explicitly.
The next step is to click inside the Connection field. In the dropdown, select the New connection.

Selecting the new connection brings up the File Connection Manager Editor dialog, where you can setup the connection.

If you click on the Usage type dropdown, you’ll notice that your only choice is existing file.
Clicking on the Browse button provides a dialog to find your package on disk. Once selected, its full path is entered in the File textbox.

Click OK to finish creating the connection to the package file.
The next property is the Password property. This lets you enter a password for a password protected child package. As this sample doesn’t call for a password, you can skip it.
ExecuteOutOfProcess is the final property. If set to true, then the child process will run in a separate process from the parent package. When deciding whether to run the parent and child packages in the same process, there are some important considerations:
MemoryHaving a child package run in its own process requires more memory. Depending on your available hardware, that may be a factor.Impact on Child Package failureWhen a child package runs in its own process, it can fail without impacting the parent process.
If you want the child and parent packages to fail together, then the child package should be run in the same process as the parent.For this sample, you can leave ExecuteOutOfProcess set to false.
With that, the Execute Package task is ready to execute another package.
As to the archiving workflow, you can use a Foreach Loop Container whose folder path is the directory of files to be archived. The File System task can use a move file operation to move each file from the directory to the archive location. You can review my previous posts on the ForEach File Loop and File System tasks for more details.
The final workflow for the parent package should look like:

However, there’s still one thing missing; I haven’t shown how to pass the free space threshold value to the child package. That can be done using a Package Configuration.
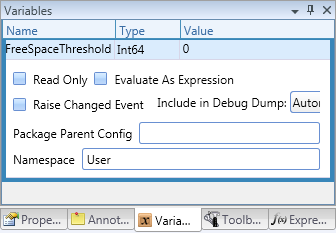
The first step is to create a variable on the Execute Package task. This variable’s Data Type needs to match the variable on the child package. I’ve chosen to give this variable the same name as the child package’s variable to show the connection between the two, although that’s not required.

Notice that the Data Type is Int64 and the Value field is 104,857,600. This is my free space threshold in bytes, which equals 100 MB.
Next, open the child package, right click in the package designer’s background, and select Package Configurations in the context menu.
This opens the Package Configurations Organizer dialog. Check the Enable package configurations checkbox so you can add a configuration.

Next, click Add to open the Package Configuration wizard.

Press Next to advance to the Configuration Type selection screen.
The first part of configuration creation is selecting the configuration type. The configuration type dropdown lets you choose from several options. You will be using the parent package’s variable so select Parent package variable in the Configuration type combo box.

After selecting the parent package variable configuration type, the name for the textbox beneath the dropdown changes to Parent variable.

This is where you specify the name of the parent variable to read from.

Clicking Next brings you to the next configuration screen, which asks you to select the property whose values will be set by the configuration. In this case, it’s the Value property on the child package’s FreeSpaceThreshold variable.
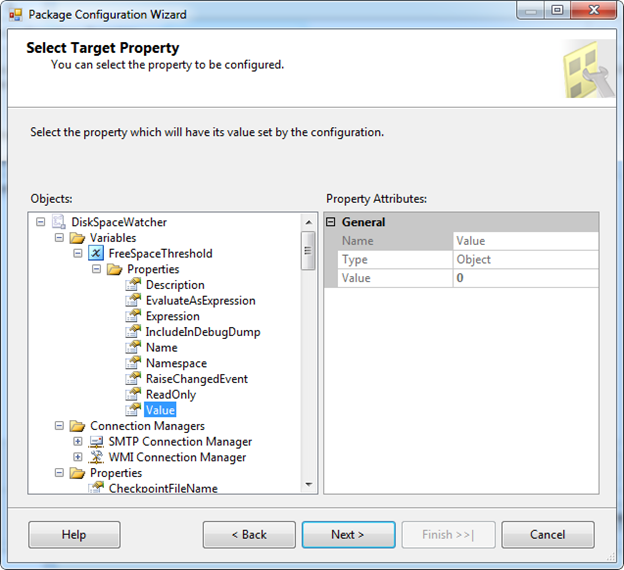
To set the property, navigate the Objects tree view to the child package’s Variables folder and expand the FreeSpaceThreshold’s Properties list to select the Value property.
Click Next to bring you to the final screen, that confirms the configuration settings.

Click Finish to store the configuration.
With the package configuration complete, you can build and run your project.
Using Mist
To start, you’ll need to create parent and child packages. If you’re unfamiliar with how to create a package, you can follow the first couple steps in the Mist User Guide’s Creating a Package topic.
Similar to the BIDS sample, I want to focus on variable creation, creating a WQL query in an expression, and setting up the package configuration. If you want more details on the WMI Event Watcher and Send Mail tasks, you can consult my previous blog posts.
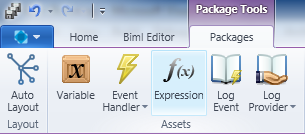
For creating the free space threshold variable, open the child package. Click inside the design background to select the package and, in the Packages tab, click on the Variable button.

This creates a variable and brings the Variables tool window to the front.

You can double click on each cell to change the variable’s name and type, and set its value.
For the WQL query, you must first add a WMI Event Watcher task to the package. You’ll also need to add a Send Mail task and a precedence constraint to complete the workflow.

Notice that in the green line for the precedence constraint, there’s also an S character. The S character stands for success; Mist uses both colors and letters to identify the evaluation value for the constraint.
To add an expression, select the WMI Event Watcher task and click on the Expression button in the ribbon.
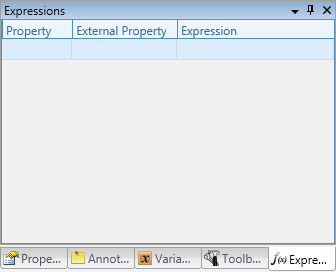
This opens the Expressions tool window, adding a new expression to the task.
Double clicking on the Property cell opens a combo box that lists all the properties for the task.
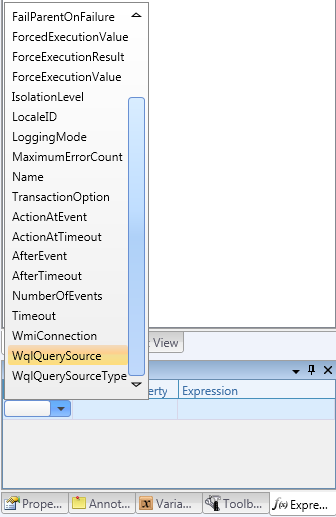
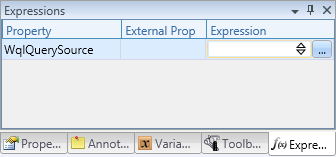
As in the BIDS sample, you should select the WqlQuerySource property. Next, you can double click in the Expression cell to access a text field where you can enter your expression.
Alternatively, you’re likely better off clicking on the ellipses button to open Mist’s Expression Builder dialog.
In the Expression Builder, enter the same expression as in the BIDS sample. If you press the Evaluate button, you will see the same result as in BIDS, along with a confirmation that the expression is of type DT_WSTR.

If you enter an invalid expression, the Evaluate will fail but you can still press OK to store the expression. This is really nice if you want to save your progress and fix it later.

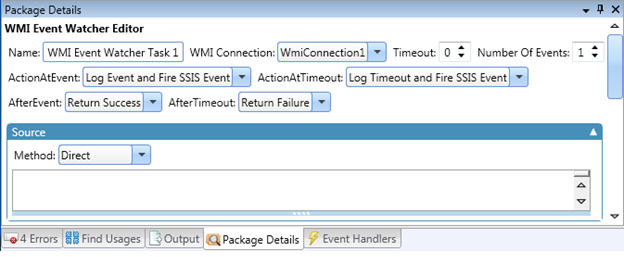
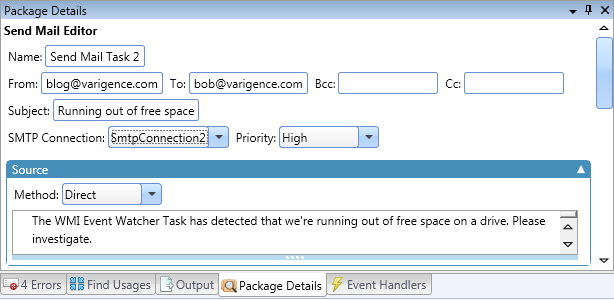
After pressing OK to dismiss the dialog, you can now fill in the remaining fields for the WMI Event Watcher and Send Mail tasks. The tasks’ details editors appear as follows:
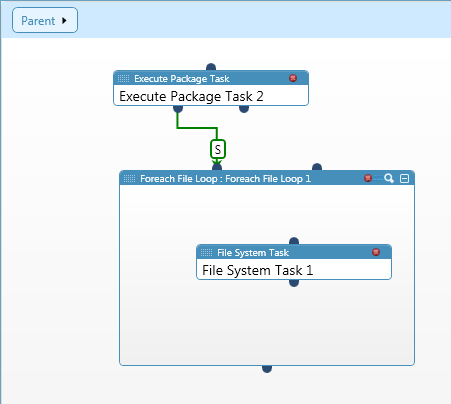
For the parent package, you will also need to create the same workflow as in the BIDS sample. To start, find the Execute Package task in the Toolbox.
Now, drag and drop it onto the designer surface. You will also need to add a Foreach File Loop task and a File System task.
After selecting the Execute Package task, take a look at the Package Details tool window. The main properties for the Execute Package task match the properties displayed in BIDS.
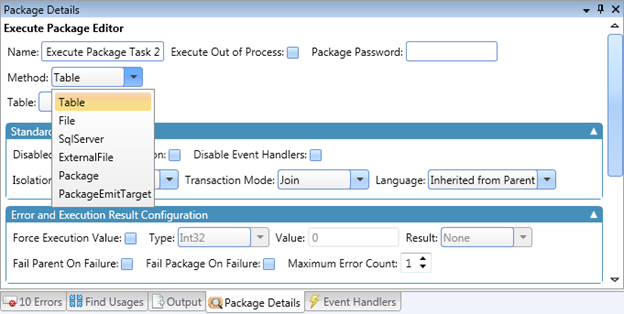
However, one key difference is that many more input methods are available. While you can choose a File connection or SqlServer connection, you can also select a table, package, or package emit target. Since both packages are in the same project for this sample, it makes sense to choose Package in the dropdown. In the Package dropdown beneath it, you can select the child package.

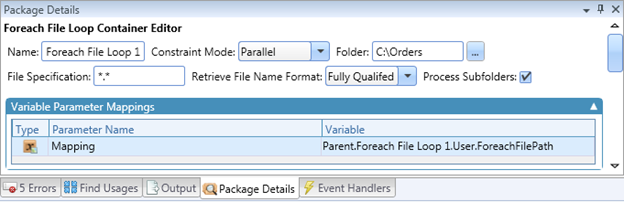
As a quick review, this is the Package Details tool window for the Foreach File Loop container. Here, we are iterating over all files in C:Orders and its subdirectories. Each file path is stored in a ForeachFilePath variable during the iteration.
In the Package Details tool window for the File System task, the source for the Move File operation is the ForeachFilePath variable. The destination uses a File connection named ArchiveConnection.

Finally, for the Execute Package task, you need to a variable of the same data type as FreeSpaceThreshold on the child package. You can repeat the earlier steps to add a variable to the package.
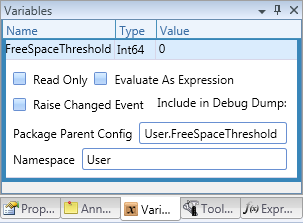
For setting up the parameter passing, using a variable, you can do something very different, and far easier, than BIDS. Returning to the child package, open the Variables tool window and select its FreeSpaceThreshold variable. In the variable’s Parent Package Config textbox, enter User::FreeSpaceThreshold (or whatever name you assigned the parent package’s variable).
That’s it! No configuration wizard or dialog boxes.
Links
Execute Package task – MSDN
Execute Package documentation for Biml
Craig